About
- Organic ingredients
- Larger quantity than comparable products
- Top 9 Free
- Smooth texture, not gritty
- Easy to make
Description
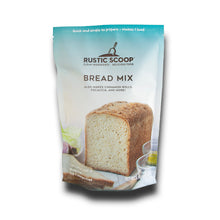
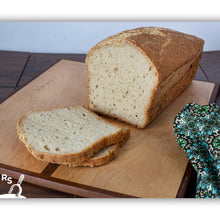
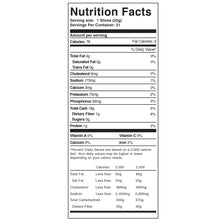
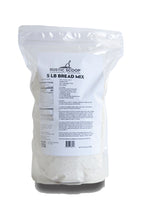
After years of perfecting the recipe, we’re proud to offer our soft, smooth-textured, and flavorful gluten-free sandwich bread. With its traditional bread consistency and great taste, this bread has been a staple in our home for years—and now we’re excited for you to enjoy it too! Easy to make with no kneading required, this bread delivers amazing results every time. Whether for sandwiches, toast, or any of your favorite recipes, its uses are endless. Each mix makes one loaf, approximately 21 slices (5lb makes 5x as much). Free from gluten, dairy, soy, eggs, peanuts, tree nuts, and refined sugar. Vegan option instructions are included below.
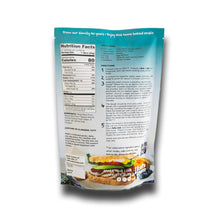
Ingredients: *Brown Rice Flour, *White Rice Flour, *Tapioca Starch, *Psyllium Husk, Cream of Tartar, Baking Soda, Salt
*Organic
This mix also makes: New Sandwich Bread Recipe, Yeast Free Focaccia, Croutons, Pull Apart Dinner Rolls, Cinnamon Rolls, New Sandwich Bread, Pumpkin Cinnamon Rolls, Turtle Bread, Stuffing, Empty Tomb Rolls,
Have Questions? Bread Baking FAQ
Instructional Video
Alternative Ingredient Options
- Yeast: We use Active Dry Yeast when making this bread, though Instant Yeast can be used as well. You may need to decrease the rise time by 10-15 minutes for proofing the dough if you use Instant Yeast. The goal is to let the bread dough rise to the top of the pan before putting it in the oven. If your yeast doesn't get foamy, it isn't alive and you'll need to start over. Don't use the yeast if it isn't alive as it will just lead to a flat loaf.
- Honey: If you don’t eat honey, then either maple syrup, coconut sugar, or table sugar will all work in place of the honey.
- Olive Oil: Olive oil can be replaced with any other light tasting liquid oil. Do not replace it with an oil that is solid like coconut oil or shortening, it will change the consistency of the bread.
- White Vinegar: White vinegar can be replaced with apple cider vinegar.
-
Egg Whites:
- A powdered egg replacer can certainly be used in place of the egg whites. You will need to use the equivalent of two (2) eggs. Powdered egg replacers will restrict the bread from rising as well as using egg whites. That said, it still makes tasty bread, it will just be shorter in height.
- Aquafaba (garbanzo bean/chickpea water) is a great alternative for eggs in our bread, though it will make the bread a bit more tender (less structure). I will often reduce the liquid by 1-2 Tablespoons if I use aquafaba as an egg replacer. You will need 6 Tablespoons of aquafaba for this recipe to replace the egg whites.
- Do not use a flax or chia egg as an egg substitute, it will not work. It will leave you with a gummy and flat bread which is no good!
Baking Tips
There are so many tips we could give. We wish we could come sit in your kitchen with you as you bake. We’ll do our best to address all that we can here and with the video. If you have further questions, don’t hesitate to ask. It’s not hard to make our bread, there are just many variables and we want to ensure your baking experience is successful.
-
Stand Mixer: You do need a stand mixer to make this bread. This dough is very thick like a traditional gluten filled dough. You can roll it before you put it in your bread pan if you want a nice shape, but you can also just shape in the pan.
- Grease the Pan: Be sure to grease (non-stick spray) your pan well. *Avocado oil/spray does NOT work for non-stick*. You can also use parchment paper in the bottom of your loaf pan. A loaf that sticks to the pan is no good. It will make cutting the loaf upside down really difficult (and messy).
- Dough Rising: The goal of the rise time (approximately 40-60 minutes minutes) before baking is to have the dough rise to the top of your pan before baking. If your dough has not risen to the top of your pan (3-4 inches) in the 40 minute rise time, let your dough rise for longer. *It is critical for the dough to reach the top of your pan before baking to get a good rise in your loaf*. Rising up to 1 hour and 15 minutes is just fine if necessary. If your dough doesn't rise well before baking, be sure you have it in a warm environment, the dough won't rise well in a cool environment. Rising your dough on top of a heating oven or in the oven on a "bread proof" setting are best. If your kitchen is warm in the summer months, it may only take 30 minutes to rise so be sure to watch it.
- Climate Changes: If you live in a place where the climate changes drastically throughout the year, the rise of your bread will change too. This bread loves humidity and warmth. If you live in a dry climate, or a dry time of year, be sure your towel over the dough to rise is fairly wet, but not dripping. You can also add up to 2 Tablespoons more water if the dough seems drier than the example in our video. In the winter, which can be dry and cold, we let the bread rise with a damp warm towel in the oven on its “bread proof” setting which has been helpful for consistency. In the summer, bread rises just fine on the counter since it’s warmer. No matter where you live or what climate you live in, you can always get great bread out of this recipe successfully. What will change the most is the how much it will rise.
-
Ideal Pan Size: A 9x4” or 8x5" pan are best for this bread as it helps it to rise and be taller. We have found that there aren’t really standard bread pan sizes. My advice is use a pan as closest to 9x4” or 8x5" that you can find. The 9x4" pan will give you a tall loaf and an 8x5" pan will give you a wider loaf. Both work great, it just depends if you want a tall or wide loaf.
- Staying Fresh: This bread is great fresh! It's just like your favorite gluten filled sandwich bread without the gluten. It will stay fresh on your counter in an airtight container for up to three days. You’ll want to freeze it sliced after that as there are no preservatives in the mix. To use from frozen, toast straight from the freezer or thaw.
- High Altitude Options: High altitude baking can be tricky with “typical” gluten filled food, much less gluten free and allergy free. Please be sure to read carefully if you live at high altitude. You may need to add up to 2 Tablespoons extra water if the dough seems too thick. We have tried to be very clear in our video so you can see the consistency. This is the most important for you to ensure it is correct. Bake at 365° F instead of 350°. Only use 2 teaspoons of yeast. Let rise for 30-45 minutes, or until the dough has risen to the top of the pan. Bake at 365° F for 50 minutes.
- Bread Toppings (optional): This bread is great topped with seeds if you like that. After you have smoothed the dough in the loaf pan and pulled in the sides, sprinkle the top with whatever seeds you prefer. Once you have sprinkled your seeds of choice, be sure the pat them down gently or they will just fall off after baking.
- Hard or Soft Water? The type of water you use matters a whole lot when baking bread. Hard and soft water effect yeast and other structure of bread due to too many or not enough minerals in the water. If the water you use is "soft" it will not produce enough structure for your bread. If the water you use is "hard", it will produce too much structure and your dough will be too thick. If you don't know what type of water you have, it's good to find out if you can. Otherwise, you will learn by the way your dough turns out. We do instructional videos to ensure you know exactly what your dough should look like. The easiest fix if you have soft or hard water is to use bottled water. Super simple and will ensure your dough will be the right consistency.
-
Half Loaves: We had one of our customers let us know that she has been making half loaves of our sandwich bread. They love our bread fresh, but the whole loaf wasn't lasting on the counter well until it was all gone. Since we don't use any preservatives in our mixes, bread will last on the counter 2-3 days. Our customer bought half loaf pans and now bakes two half loafs. One they eat fresh and the other they cut and freeze. She bakes them in a convection oven at 350°F for 40 minutes.


